Learn about:
- Organizing your library (super-important)
- Creating Books & Chapters
- Creating Concepts
- Uploading Video or Images
- Adding Play Animations
- Editing Concept Descriptions (Notes)
Organizing your Library
Understanding your knowledge library structure and options
Before diving into the details its important to understand your options for organizing your knowledge library. Anyone whose saved far too many things onto their desktop or has had trouble finding files on their computer will understand this importance.
The most important questions to keep in mind are:
- Who is going to be accessing this content?
- How do I make it easy to find what they are looking for?
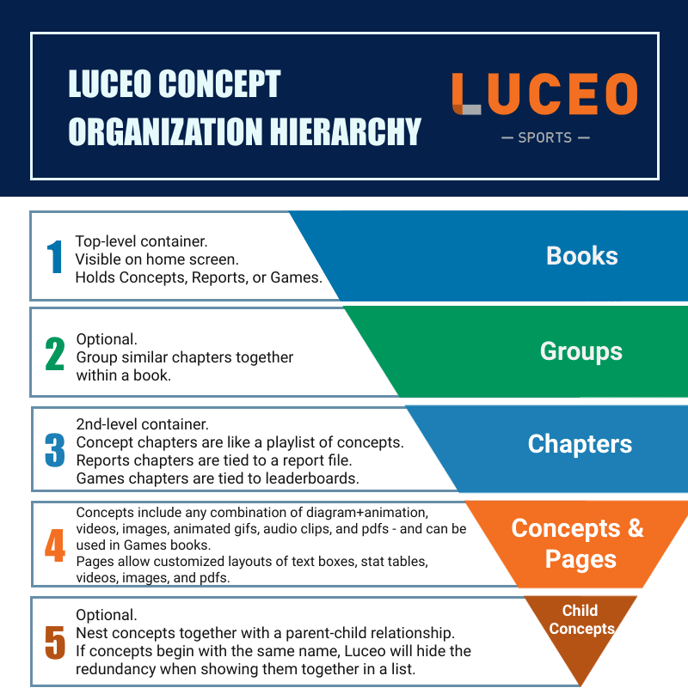
There are five layers to Luceo's content management structure. These five layers will be important for finding the content you - and others - are looking for:
Books > Groups > Chapters > Concepts > Child Concepts
A simple way to map out your knowledge library content structure is to create a bulleted list around 5 books, (your 5 main options when you log into Luceo.app and Assist) and organize your content around these layers:
- OFF/DEF PLAYBOOKS (one for each)
- TIMEOUT MENU (Tech on the Bench)
- FILM SESSIONS (team & one-on-one)
- REPORTS (Gameplans & Scouting Reports)
- MEMORY GAMES (Playbook & Game Plan Quizzes)
The LUCEO LUMBERJACKS Demo account is great for getting ideas for how you may want to organize your content library.
Creating Books and Chapters
You can create Books, Chapters (and Groups of Chapters) to organize Concepts and save images, video and play animations to them.
Book Types
There are also three types of books you can create:
- Concepts: These are used for storing most of your knowledge library content
- Games: These are used for generating brain games from knowledge library content
- Reports: These are used for associating reports built in the Game Plan editor
1) Creating Books
To create a new book in Luceo.app you simply click the orange plus button on the top right hand side of the screen.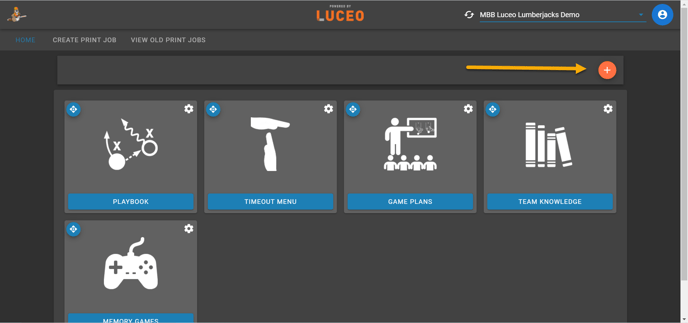
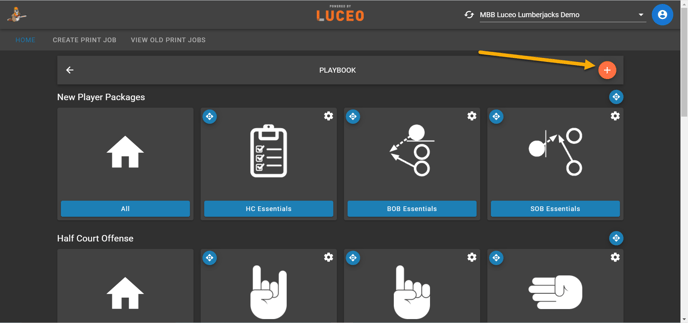
2) Creating Chapters
To create a new chapter, open the book you would like the new chapter to live in. Once in the book click the orange plus button on the top right corner.
Once you click the plus button fill out the all the information in the following fields and hit save
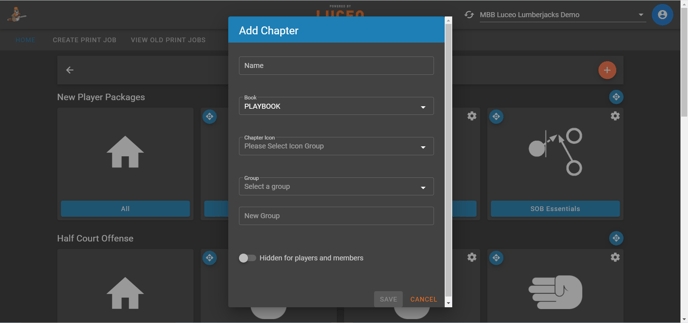
NOTE: If you are planning to make a number of chapters that all have something in common, (ex: Team Offense) use the GROUP function to divide up your chapters into sections.
Now you are ready to create Concepts within your Chapters and add image, video on play animations to them.
Creating Concepts
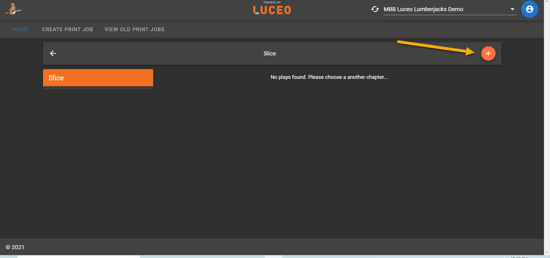
Creating concepts is the quickest way to create, save, and share coaching explanations. To create a new "concept", simply click on the chapter where you want to add the concept. Once in the chapter click the orange button on the top right corner
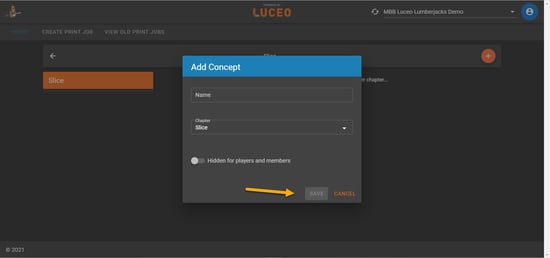
Fill out the concept name, if you want it hidden/shown, and click save!
Next, you probably want to do one or more of the following:
- Upload some combination of Videos, Images, Gifs, or PDFs
- Set a video, image, or PDF as the primary focus of the concept
- Add a written concept description
- Draw an Animated Play or Drill Diagram
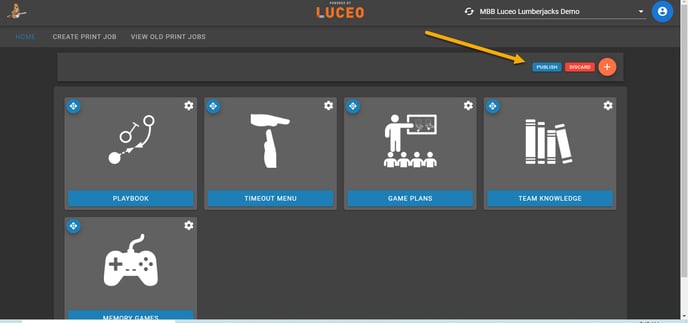
Once you save your new concept, make sure to publish the changes by clicking the blue publish changes button on the top right.
Uploading Video or Images
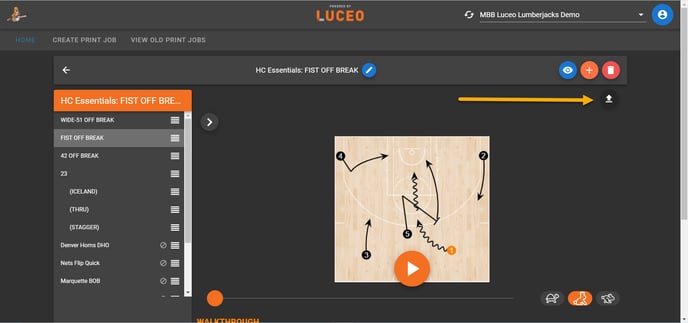
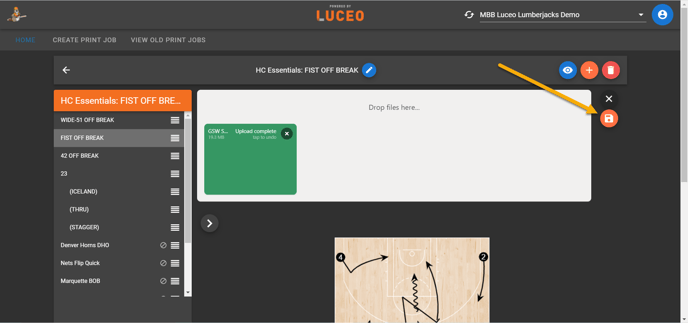
In this article you will learn how to upload a video file (mp4 or MOV) and/or an image (PNG file) To upload a video or image to your concept, you will simply click the upload button on the right side.
NOTE: Images and videos can be the primary assets within a Concept. You do not need a play animation in order to add images and videos to a Concept.
Now simply drag and drop your video into the white box. Be sure to allow the video to full upload and turn green before hitting the save button.
NOTE: You can add as many video or images as you want and drag and drop them inside the asset window to put them in the order you wish them to be viewed.
Once you've save the video/image you should decide two things:
1. What asset shows up first in the ASSIST mobile app
If you want a video clip or image to appear first then choose "set as primary". If you want a play animation to appear first then do not click this option.
If you do not choose an image to "set as primary" and there is no play animation a blank court will appear first in the ASSIST mobile app. So be sure to turn this on if you want to start with video/images.
.gif?width=688&name=Set%20as%20Primary%20(1).gif)
2. What assets do you want to download automatically when opening the ASSIST mobile app
If you are going to store a lot of video content in your library you should set all video assets to "manual download". This allows team members to choose which assets to DL to their phone on the ASSIST mobile app instead of having the system attempt to DL all assets automatically.
.gif?width=688&name=manual%20dl%20(1).gif)
Adding Play Animations
You can create and edit animations with Luceo.app using any internet connected web browser.
Creating Play Animations for a concept is simple:
STEP ONE: Choose the Concept you want to add a play animation to.
STEP TWO: Click on the pencil icon to open the play drawing menu
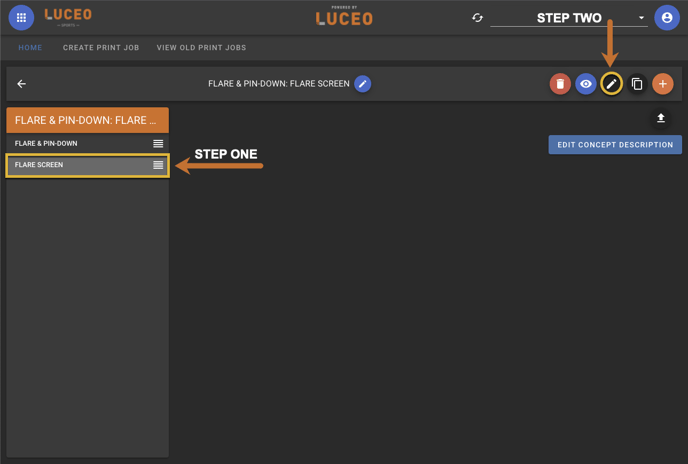
STEP THREE: Create your play, hit the disk icon to save it and then "Publish" changes to the Concept.
NOTE: It may take a few attempts to get your lines to stick on the court.
Editing Concept Descriptions (Notes)
This article will show you how to add/edit a written Concept descriptions. Every Concept allows you to add a description by hitting the "Edit Concept Description" button. This will open a rich text editor that will allow you to enter pretty much anything, such as:
- Play Animation Description
- Notes from video clips
- Instructions/links for other users
- Full write-ups/articles
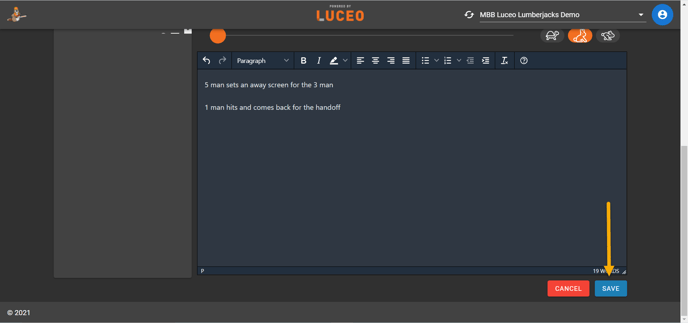
When you have the concept you would like a description for selected, find the blue box at the bottom. (Edit Concept Description)
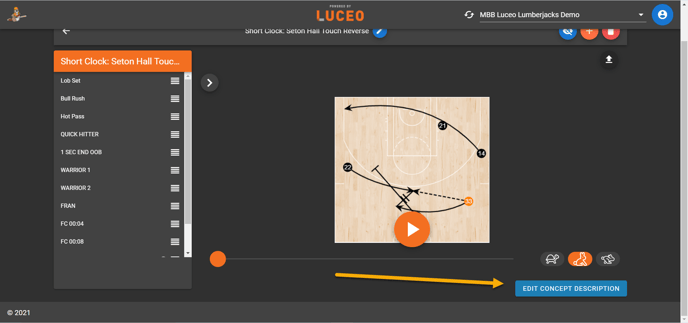
Using the text box, write any notes you would like to add, then hit the blue save button.
For play animations, you can create tags for players by typing: <player=X> into the description, with X = 1, 2, 3, 4 or 5
As always, once your are finished making any changes be sure to publish your changes by clicking the blue publish button in the top right corner!
ddd